
Automation is the key to a stable and scalable business. One of the most powerful features in our CRM system is Robots. They allow you to perform actions according to pre-defined conditions, which reduces the load on managers and helps to support clients at all stages of the funnel without manual control.
In this guide, you’ll learn how the Robots functionality from our service works, what triggers and actions are available, and how to properly utilize it to improve sales performance.
Operating logic: if → then
The essence of the robot’s operation is simple:
IF a certain condition is met,
TO performs a predetermined action.
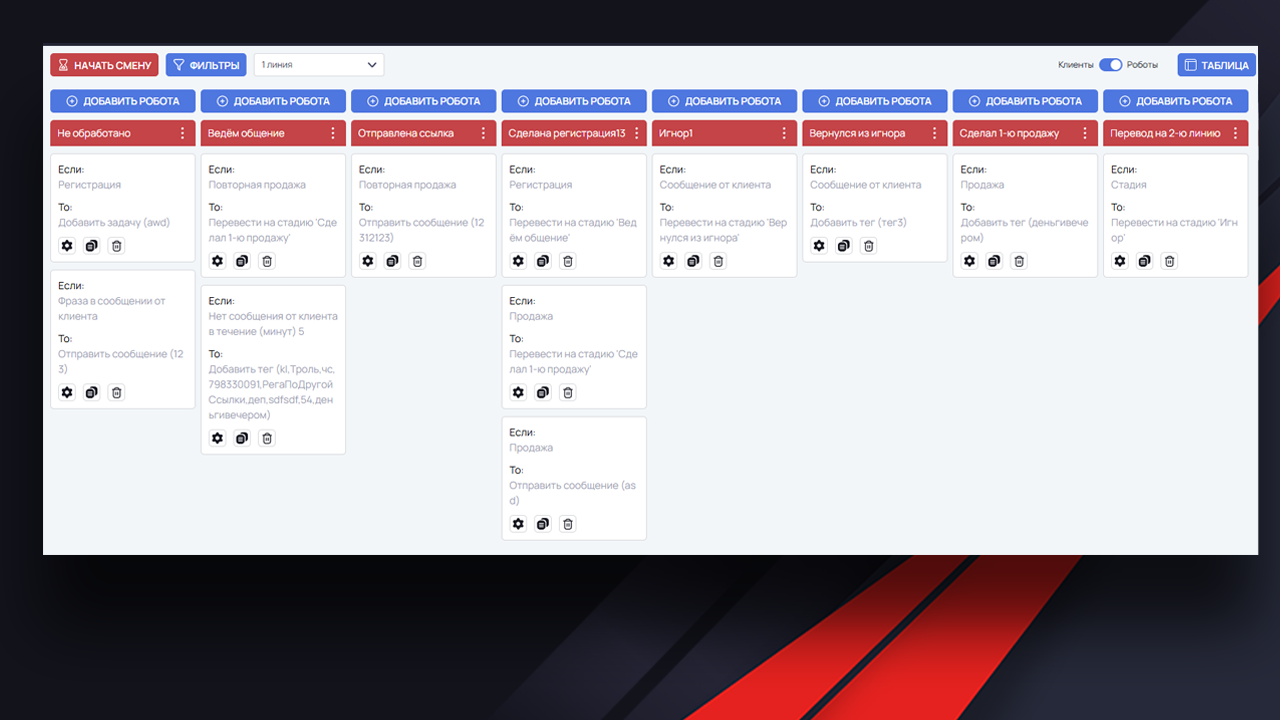
One or more robots can be assigned to each status (stage) of the funnel. This allows you to respond flexibly to the actions of a client or manager.
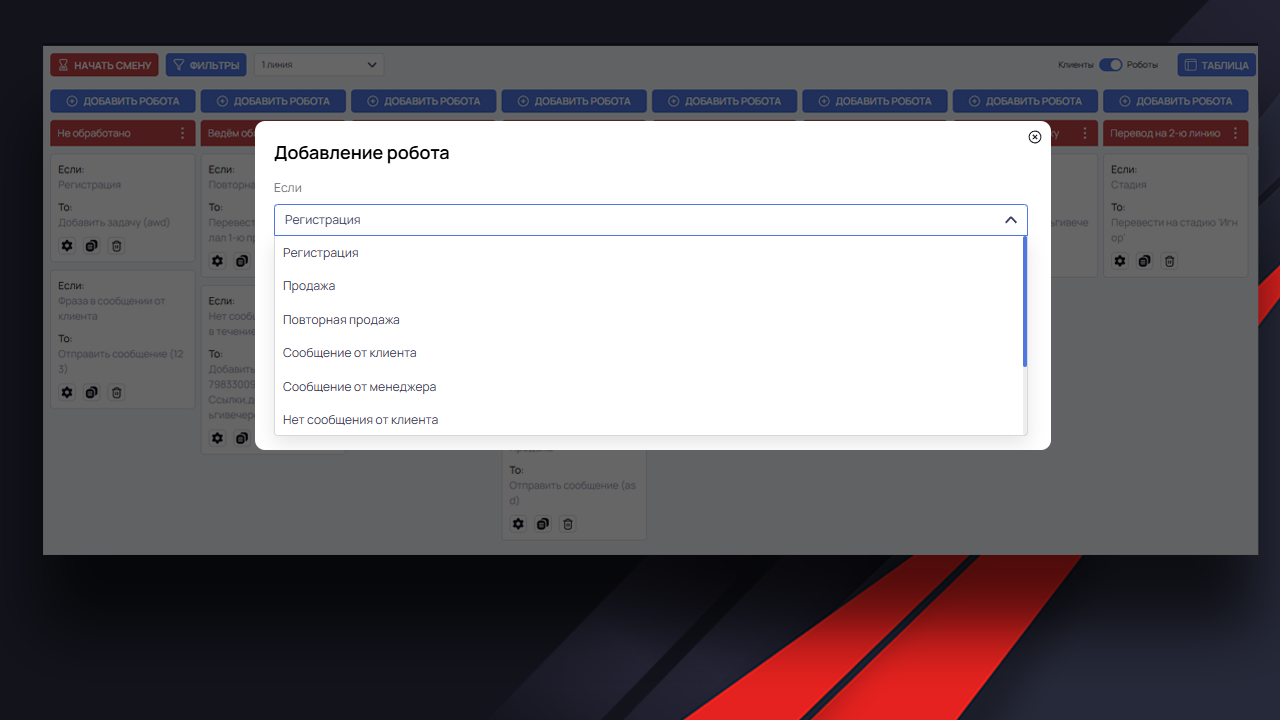
Conditions (IF) that start the robot
The system tracks certain events and conditions. Here are the main types of conditions:
– Registration – the client has registered in the system.
– First sale – the customer made the first purchase.
– Repeat sale – a second or subsequent purchase is recorded.
– Message from client – any incoming message is received.
– Message from manager – an outgoing message has been sent.
– No message – there is no correspondence from the customer or manager within the specified time.
– Stage transition – the customer has been moved to a specific stage of the funnel.
– Phrase in Message – A keyword or phrase in a client message has been detected.
💡 Tip: Use a phrase trigger to automatically respond to frequent questions, such as requesting a price list.
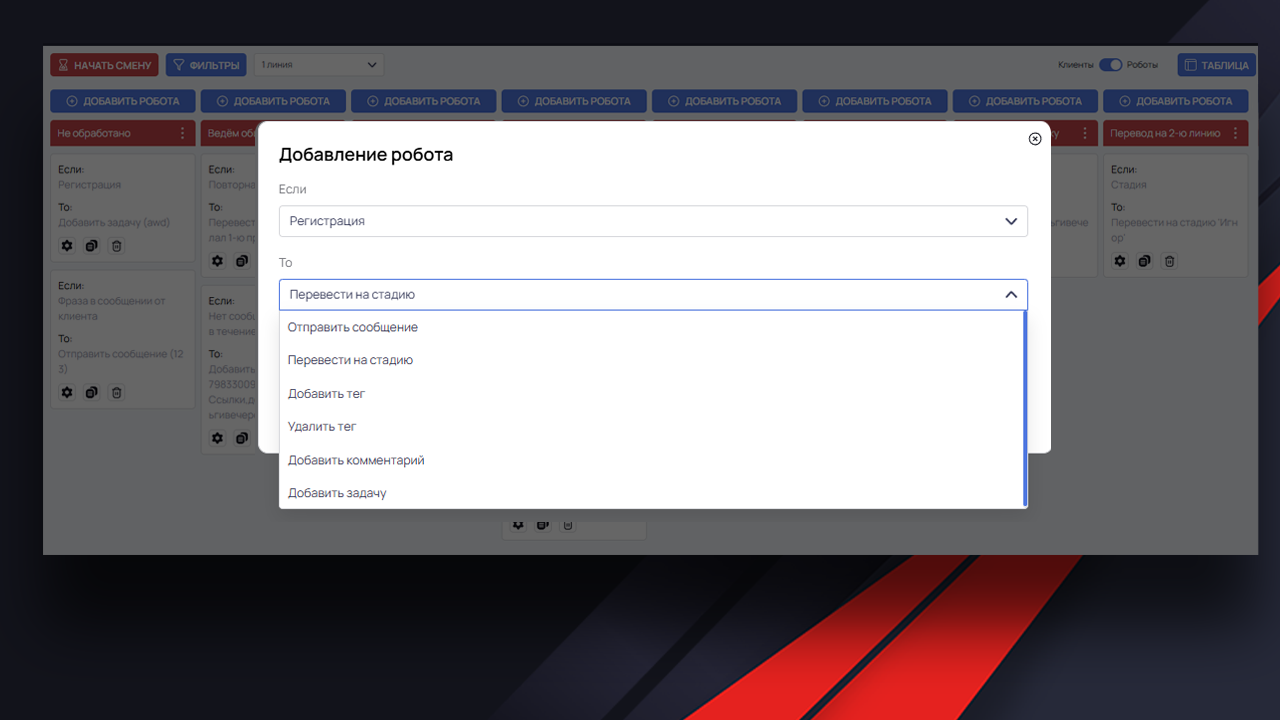
Actions (TO) that the robot can perform
Once a condition is triggered, the robot performs one or more actions. Among them:
– Send Message – auto-response on behalf of a bot or manager.
– Transfer to stage – automatically change the stage of the transaction.
– Add Tag – tag a customer for filtering or analyzing.
– Remove Tag – remove an unnecessary tag.
– Add comment – internal note in the transaction card.
– Add task – create a task for the manager (for example, contact in a day).
📷 Examples of settings can be seen in the screenshot below
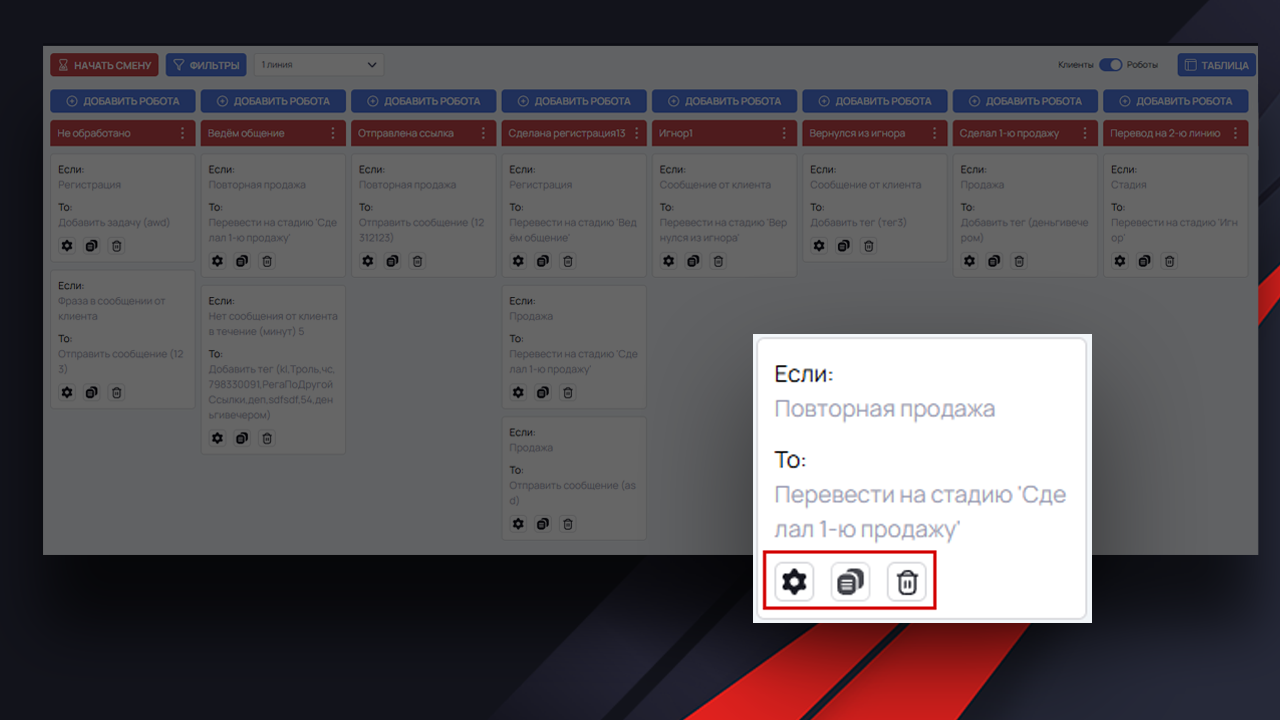
How to control robots
The following actions are available for each robot:
⚙️ Edit – change a condition or action.
📄 Copy – duplicate the setting for another step.
🗑️ Delete – remove the robot completely.
Examples of automation
Here are some typical scenarios to get you started:
– If the customer hasn’t responded within 10 minutes → move them to the “Ignore” stage.
– If the customer’s message contains the word “price” → send an auto-response with the current price.
– If a sale has occurred → move the customer to the “Made 1st purchase” stage.
– If the manager has sent a message → remove the “no reply” tag.
Recommendations for customization
So that “Robots” actually help, not hinder:
– Avoid overload: don’t add dozens of robots to a single stage – this will make control and debugging more difficult.
– Test on a “sandbox”: before implementing into a working funnel, test the logic on test transactions.
– Watch for conflicts: make sure the terms don’t contradict each other or trigger the same actions indefinitely.
Conclusion
The “Robots” functionality is an indispensable automation tool in MVP CRM. It allows you to build smart scenarios of interaction with customers, increasing the speed of response, reducing the number of routine tasks and improving the quality of service.
Start with simple scenarios and gradually build complex logic – the result will not wait.


No Comment! Be the first one.