Introduction to Task Management In MVP Project, users have the ability to create tasks for each player separately. This greatly improves the process of managing customers who write to the bot persona. Customized tasks help to structure the work and not miss important customer interactions. How do I add a task? Creating a task in MVP Project is a simple and intuitive process. To get started, click the “Add Task” button. A configuration interface will open in front of you, where you will need to fill in a few mandatory fields. For example, in the “Task name” field, enter any name you like, be it “work out an objection” or “ping”. 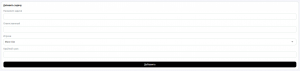 Assign responsible manager Each task should be assigned a responsible manager. This can be anyone on your team who will be assigned to the task. The task list will show both the assigned manager and the author who created the task. This makes it easy to keep track of who is responsible for a particular task. Select a player and deadline To assign a task to a specific client, select the desired player from the list of names or use the manual search. Set a deadline for the task so you don’t miss important deadlines. Use filters to sort tasks by deadlines and highlight overdue ones. All tasks are displayed on the main page of the Tasks section. Here you can quickly assess the status of all current tasks and see which ones need your attention. For ease of interaction, you can click on a customer’s name to open a dialog page with them in messenger and continue the conversation right from there.
 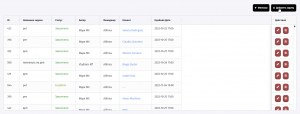 Thus, creating and managing tasks in MVP Project allows you to optimize your work with clients and increase the efficiency of interaction.
How to create tasks in MVP Project


No Comment! Be the first one.